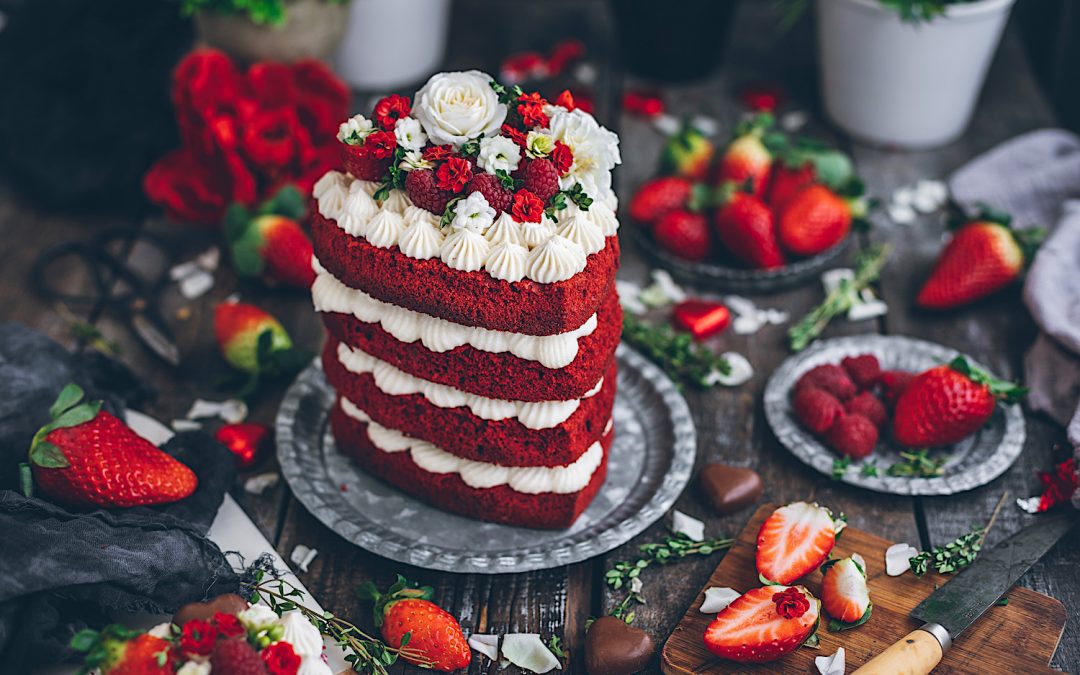
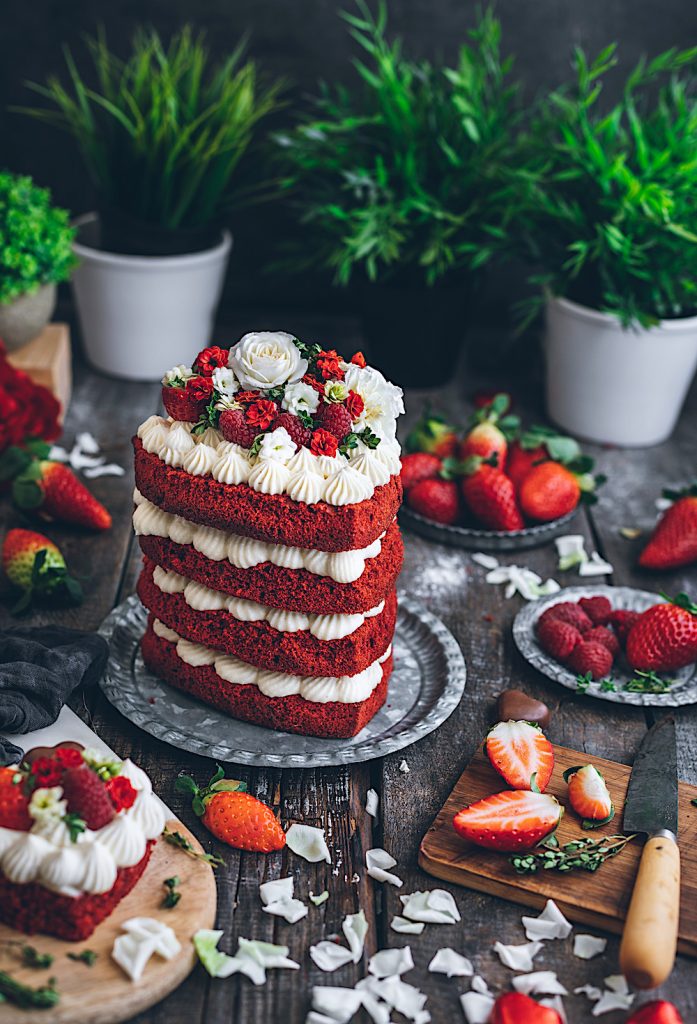
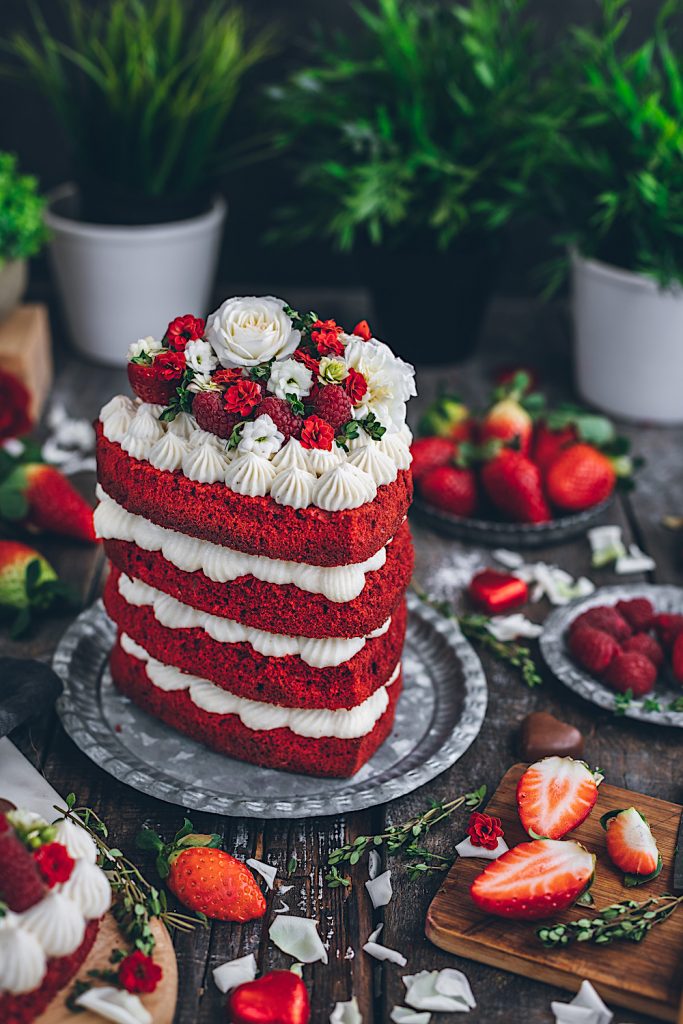
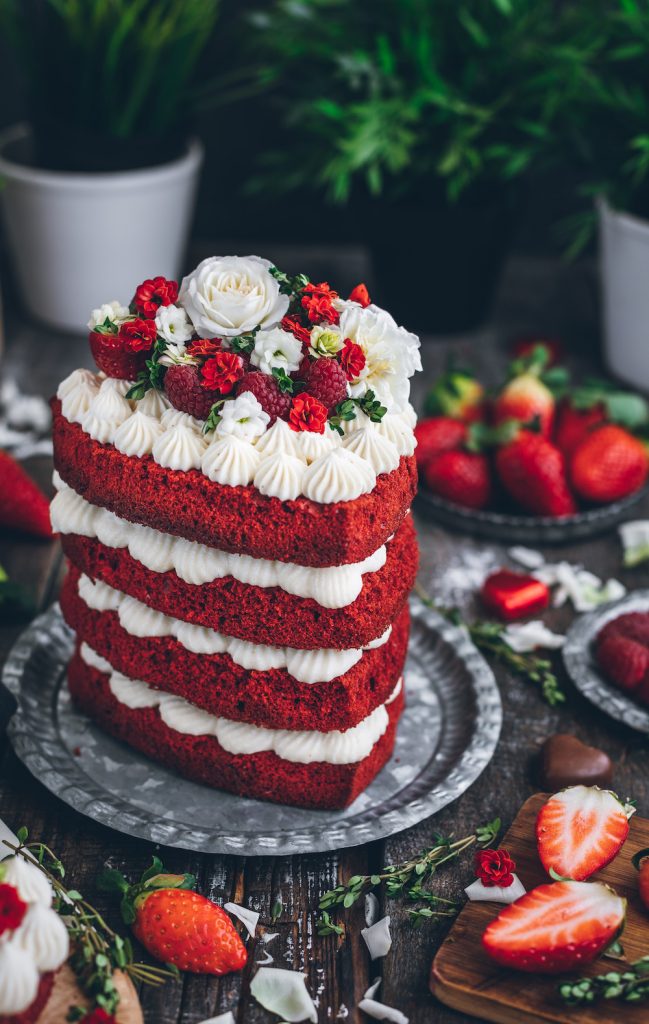
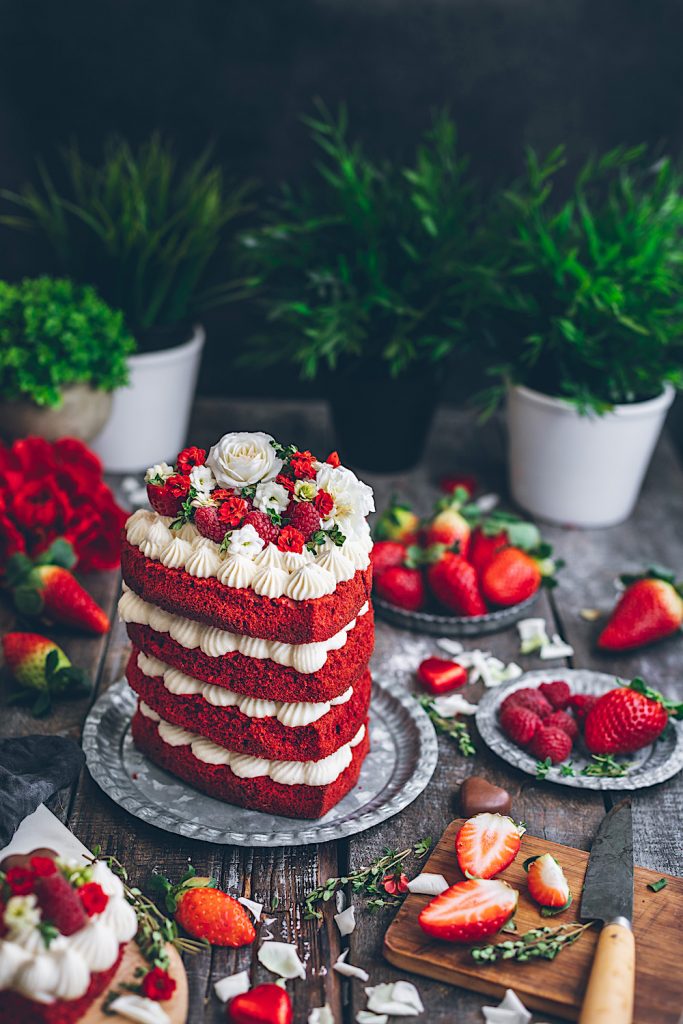
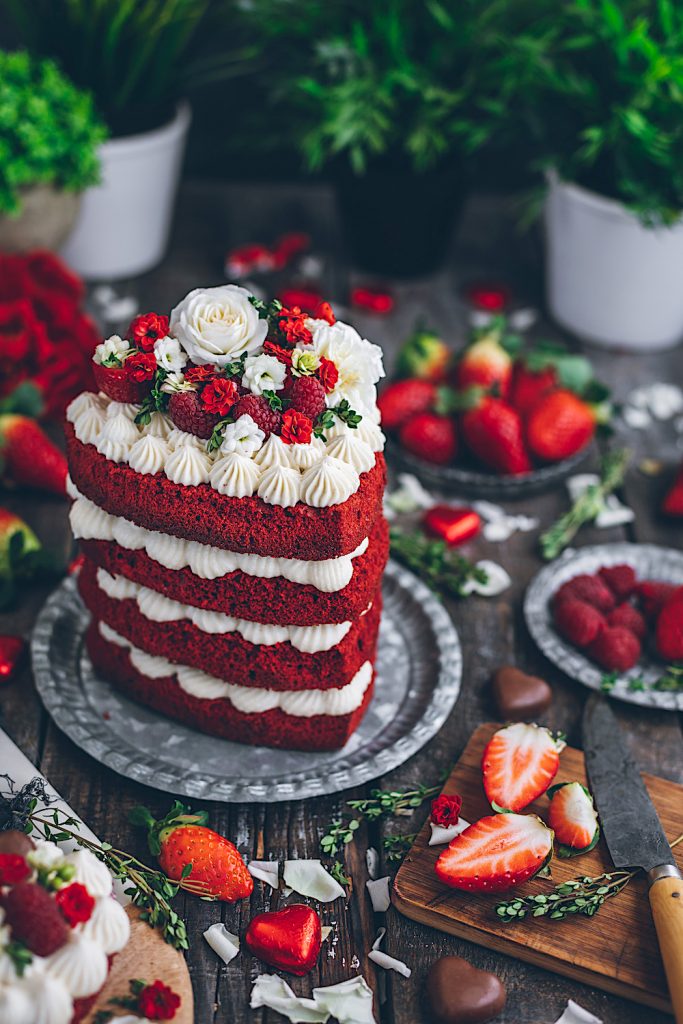
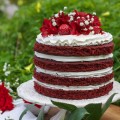
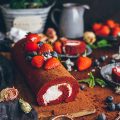
This Red Velvet Cake is my version for Valentine's Day. . It is one of my favorite cakes that I have prepared for many years in many versions because I love that touch of cocoa and that beautiful color.
This year I bring it to you in the shape of a heart. I have modified my original recipe to add more eggs and yolks that make the cake really soft and much fluffier than in other versions. I have also used part butter and part oil which makes it very juicy inside.
Finally for the cream I have added liquid cream. The original cream of the Red Velvet cake has cream cheese and butter. This makes it a delicious cream but with a very dense texture that I love to put on top of a muffin for example, but that I find too heavy to take in a multilayer cake like this.
So I have decided to add part of liquid cream, which when mounted gives it a very silky texture at the same time as light. Anyway, for me it is a winning cake that you can make like me in the form of a multi-layer cake, you can make a single cake and accompany it with the cream or you can make a cake of only two or three floors. The important thing is that you make the version you do you are going to fall in love because it is great.

Ingredients
For the sponge
- 120 g of butter without salt at room temperature
- 120 g sunflower or seed oil
- 240 g sugar
- 1 tablespoon vanilla extract
- 1 tablespoon red food coloring, plus more as needed (I've used deep red gel)
- 4 eggs, at room temperature
- 4 egg yolks at room temperature
- 280 g flour*
- 40g pure cocoa powder
- 2 1/2 teaspoon baking powder
- 1/2 teaspoon salt
- 240 ml buttermilk or 240 ml plain yoghurt (I use skimmed) with a tablespoon of lemon juice at room temperature
- 30 ml milk
For the cream cheese frosting
- 300 g cream cheese at room temperature
- 160 g unsalted butter at room temperature
- 1 teaspoon of vanilla extract
- 1 teaspoon freshly squeezed lemon juice
- 180 g icing sugar
- 200 ml of 33% fat liquid cream – the cream filling of the red velvet does not have cream but to be able to decorate it like this, I prefer to put cream because this way it is a much silkier, lighter and easier to use cream to fill the cake
Directions
Preheat the oven to 175°C.
We generously grease the molds (I have used grease spray), and put a baking paper cut the same size of the mold on top and grease again. I have used 5 molds and assumed so I have left over dough for a cake of 15 cm. If you use 20 cm molds you will have for 4 generous cakes.
In a standing mixer equipped with the shoulder attachment, beat the butter at medium-high speed until it is creamy and smooth, about 1 minute.
Lower the speed of the blender to medium and add the oil, sugar and vanilla. Beat for about 5 minutes, until the mixture has a light color and has doubled the volume almost double.
Add the red dye and continue beating, until the dough has a uniform color.
Lower the speed again to medium-low and add the yolks, and the eggs one at a time, mixing each one until it is incorporated well before adding the next one. With the help of a spatula, scrape the walls of the bowl.
In a separate bowl, mix the flour, cocoa powder, baking powder and salt until well combined.
Add a third of the flour mixture to the butter mixture, mix at low speed until combined. Add half of buttermilk or yogurt, (depending on whether we are going to use one thing or another), and mix until they are completely incorporated. Repeat with another third of flour, remaining buttermilk and then finish with the last third of flour, scraping the bowl and shoulder after each addition.
Fill the prepared molds with the dough and spread it evenly with a spatula. We gently hit the molds against the top to make the excess air come out and then we do not find holes in the cake.
Bake for about 20 minutes until when pricking with a toothpick in the center of the mold, it comes out clean.
Let the cakes cool in the molds for 15 minutes and then transfer them to a rack to cool completely.
For the cream cheese frosting
In the bowl of a standing mixer equipped with the shoulder attachment, butter with the iced sugar until smooth and lump-free. Scrape the walls of the bowl every time the mixture is stuck to the bowl.
Add the cream cheese and continue mixing until smooth, scraping frequently. There should be no cream cheese or butter left in lumps. Add the vanilla, lemon extract and lemon juice along with the cream and wait for the cream to be soft. Slowly add the golden syrup and we can fill the cake!
We put a cake on the base. Using an elbow spatula, we spread a layer of the cream half a cm thick on the cake, making sure that we reach the edge. I prefer to do it with a curly mouthpiece. Place the following cake on the frosting and cover with another layer of frosting.
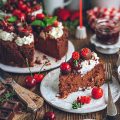
Repeat with the last cake. Decorate with strawberries, raspberries and if we want we can add chopped chocolate and some flowers.
Serve the cake immediately or we can store it in the covered fridge for up to 24 hours.
Tips and Tricks
- *To make this cake in a gluten-free version, you can replace the wheat flour with 140 g of cornstarch and 140 g of rice flour, and add an extra teaspoon of baking powder, or you can also replace it with a gluten-free flour mixture of those sold already made for cakes
- You can make the cake without food coloring. It won't be as pretty, but it will be just as delicious. I like to use gel coloring. There are several brands and the color should be extreme red because it is the best for this cake.
- To be able to cut the cakes into a heart shape, make a cardboard template
- The Red Velvet is usually served completely covered with cream, but I think it looks so beautiful!
- Difficulty: easy
- Preparation time: 35 minutes
- Servings: 10
(I first posted this cake on February 10, 2022, but I've made some 'changes to make it even better)

 Español
 English
 Français