The pandoro is typical Italian sweet and together with the Panettone is probably the best known also outside Italy. Be is a type of brioche with much aroma and soft taste and has many variants.
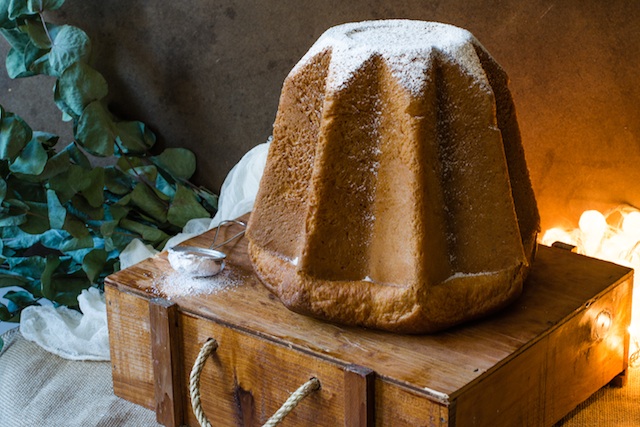
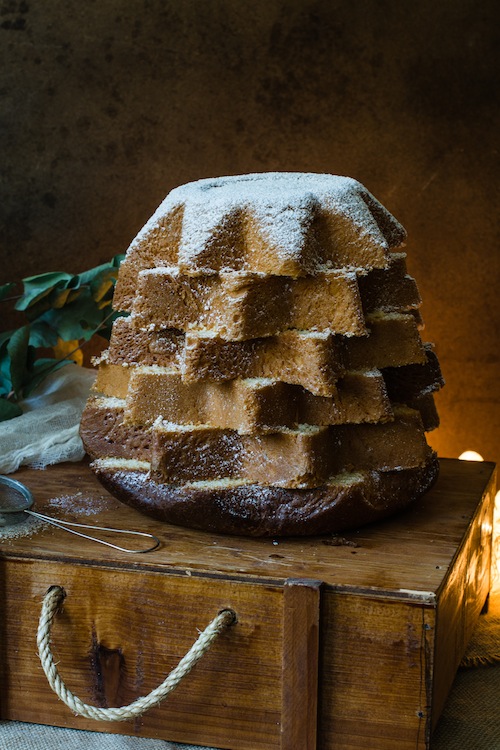
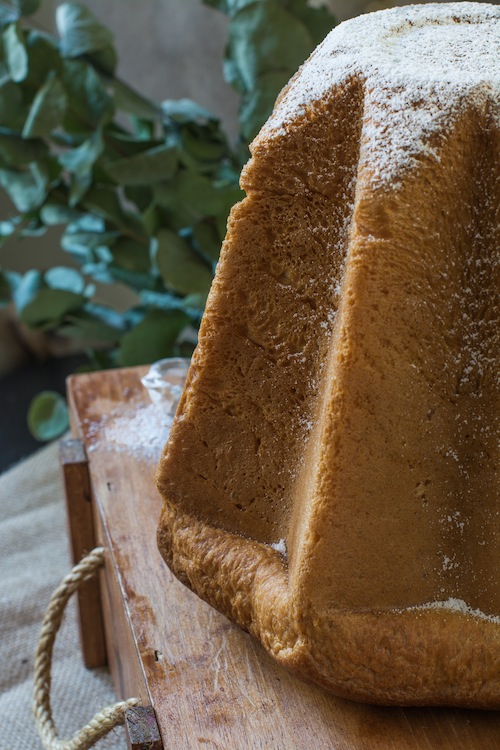
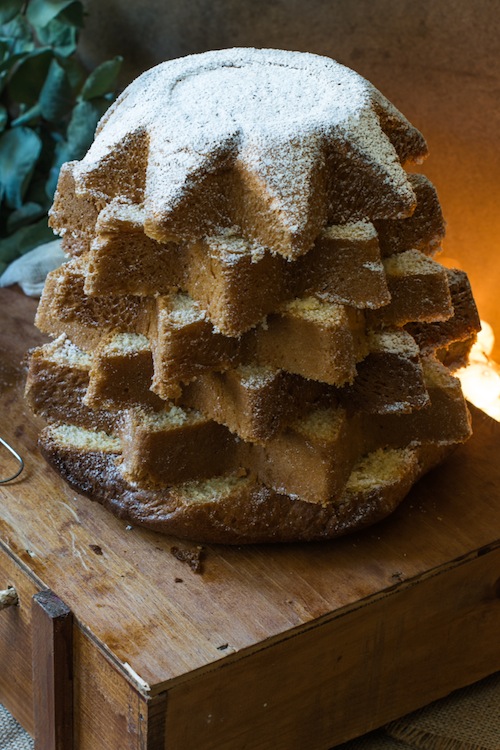
The Pandoro is very characteristic cone shaped but as one starnormally eight-pointed. The mass, type brioche as you have said with a delicious vanilla flavored and my I like to put a little grated lemon that although it is not the predominant flavor if given an extra aroma.
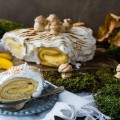
The Pandoro that I bring you today is the traditional, and has no cream or fruit. Today it is very normal to find the Pandoro with chocolate chips, raisins or fruit, such as the panettone, but the original is as this Pandoro, with all of its flavor, but without adding anything else, just a little icing sugar over (the sugar gets you when we are going to take it and not before because it can make us get a bit hard and dry).
In Italy you can find it everywhere, in cardboard boxes or in the bakery, because it is a very typical, and a little cumbersome sweet. I bought mould to make it and I use it a lot. I recommend that you buy it because both the shape and the cooking is different and what really characterizes this rich candy that many say that it has its origin in Verona. Sea of probe is this delicious and I hope to do much Pandoro at home starting today. You just need patience and I am sure that I will go to the first.


Ingredients (for a pandoro about 1 kg)
For the pre-ferment
- 65 g of flour strength
- 33 ml of water at 30 degrees
- 16 g fresh yeast or 5 g of dry Baker's yeast
For the first mass
- the pre-ferment
- 120 g of flour strength
- 30 g sugar
- 65 g of egg
For the second mass
- the first mass
- 250 g of flour strength
- 10 g powdered milk
- 130 g sugar
- 14 g of honey or syrup
- 185 g butter at room temperature with texture ointment
- 160 g of eggs, lightly beaten
- 28 g egg yolks
- 1 tablespoon vanilla
- 1/2 teaspoon of lemon or orange zest
Directions
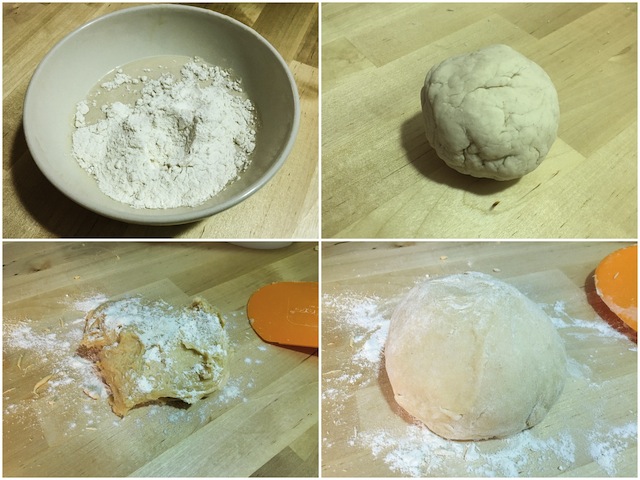
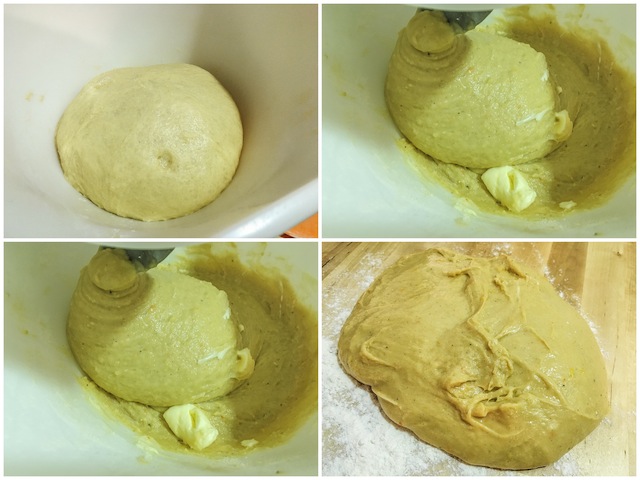
1. the first is to prepare the pre-ferment. To do this in a bowl put the yeast in the lukewarm water. When completely dissolved, we began to add the flour. The first 20 grams and mix in the bowl. We must form a compact ball so we'll have to knead until all the flour has been incorporated with the rest of the flour onto the work surface. Form a ball with the dough and put it in a large bowl. Cover and let rise until double the volume covered with a damp cloth (a few 90 minutes). I still use my shower cap for masses and leave it to rest inside the oven.
2. last this time, prepare the first mass. To do this, we put the pre-ferment in bowl of electric mixer, and add the ingredients and the first mass: sugar, flour and half of eggs. With the kneading hook, we knead at speed low (my Blender has 7 speeds and I do it in 2). After a couple of minutes add rest him eggs and continue whisking until it forms a ball which caught in the hook. We scratch with a squeegee the bottom of the bowl and hook to remove the mass well, and return to knead with mixer until it forms a smooth, firm ball (about 10-15 minutes) that is off of the walls of the bowl.
3 we get the dough on floured surface ligerament and electric mixer Bowl a little hand to form a ball. In the bowl of the mixer clean sprinkled flour place dough ball. Cover with plastic wrap (or a shower CAP), and let rest with the oven off for others 90 minutes.
4. now turn to elaborate the second mass. Add to the Bowl flour, sugar, honey, egg yolk, zest of l lemon and vanilla and started kneading again with hook Dela mixer. After a minute, we began to add lightly beaten whole eggs. Continue beating until dough starts to peel off the bowl. At that time we stopped the blender and scratch the walls of the bowl and the hook to remove the entire mass. This way we stimulate the formation of gluten. Continue kneading until the dough is off of the walls and begin to add the butter in small pieces expected to dispose of a piece before adding another. At this time the mass will become sticky again and will look like a disaster but don't be afraid, everything goes perfectly. You just have to leave beat minutes 30-.40 on low speed so that the flour to absorb all the butter.
5. Meanwhile, grease the mould. I use a spray grease but you can do it with butter, taking care that all angles are well greased.
6. when dough is off mold, stop the mixer and dump the dough onto a lightly floured work surface. With a soft dough form a ball. The dough will be smooth and soft. Put the ball in the mold the smooth part of the ball of dough can be upside down. We slightly smooth the surface by hand taking care that the dough get well into edges. Cover with plastic wrap lightly oiled down and let stand a few hours in the oven until the dough reaches edge of mold (between 2 and 3 hours)
7. when the tambourine has risen, preheat the oven (top and bottom heat mode) to 170 ° C and, meanwhile, to uncover the pandoro so it dries a little (to form the skin).
8. place the tray in the bottom of the oven to prevent the Pandoro from burning up by touching the grill (the dome will grow much if you have done everything correctly). When is the oven hot to introduce mold.
9 spent the first 10 minutes, lower the temperature to 160 ° and continue for another 40-50 minutes. Insert a thermometer to the center of Pandoro, directly measured 96 degrees. If you don't have a thermometer, a 1 kg Pandoro bake in some 50/60 minutes of cooking; and a 500g in 40 minutes Pandoro. Each oven behaves in its own way that is necessary to take a thermometer (mine is from IKEA and cost me 9 euros and I am delighted that does not cost a Fortune) but you never have to do is open the oven before the first 40 minutes.
10 last this time and when the pandoro is ready, let cool 3 hours before removing from pan. Past this time rotate the mold and unmold.
11 let stand for a few hours and then put it in a plastic bag sprayed with your favorite liquor. Serve sprinkled with lots of icing sugar.
- If you wish you can add a few chocolate chips
- Prep time 6 hours
- Difficulty: easy
- Servings: 10


 Español
 English
 Français
I love the presentation in the last picture!
Thank you Ricardo. I'm glad :)
We love the Pandoro my husband is from Verona and I'll take the time necessary to produce it thank Loleta.
Flower me glad you animes. Your husband will be happy to eat a delicious pandoro done for you, and your super happy to also do it at home, because you'll see delicious thank you very much for being here with me
Hi, I'm from Argentina, it's the first time I'm making the recipe and I see your blog. I ask only 5g of dry yeast carries?
If only that amount. Best regards